Overview
Ever wanted to light up the night? The led dress is a perfect beginner project for anyone looking to spice up their clothing for prom.
Materials:
-
Fairy lights
-
Portable battery
-
Sewing needles and thread
-
Sewing Pins
-
A dress or other clothing appeal
Choosing the right dress
Although you can do this project with any kind of dress, there are certain aspects that makes things easier:
I would recommend doing this with a dress that has layers. This will make it easier to see the lights, and to sew them in.
I also recommend a dress with pockets. This can be quite hard to find, but pockets make hiding all the electronics so much easier.
Steps
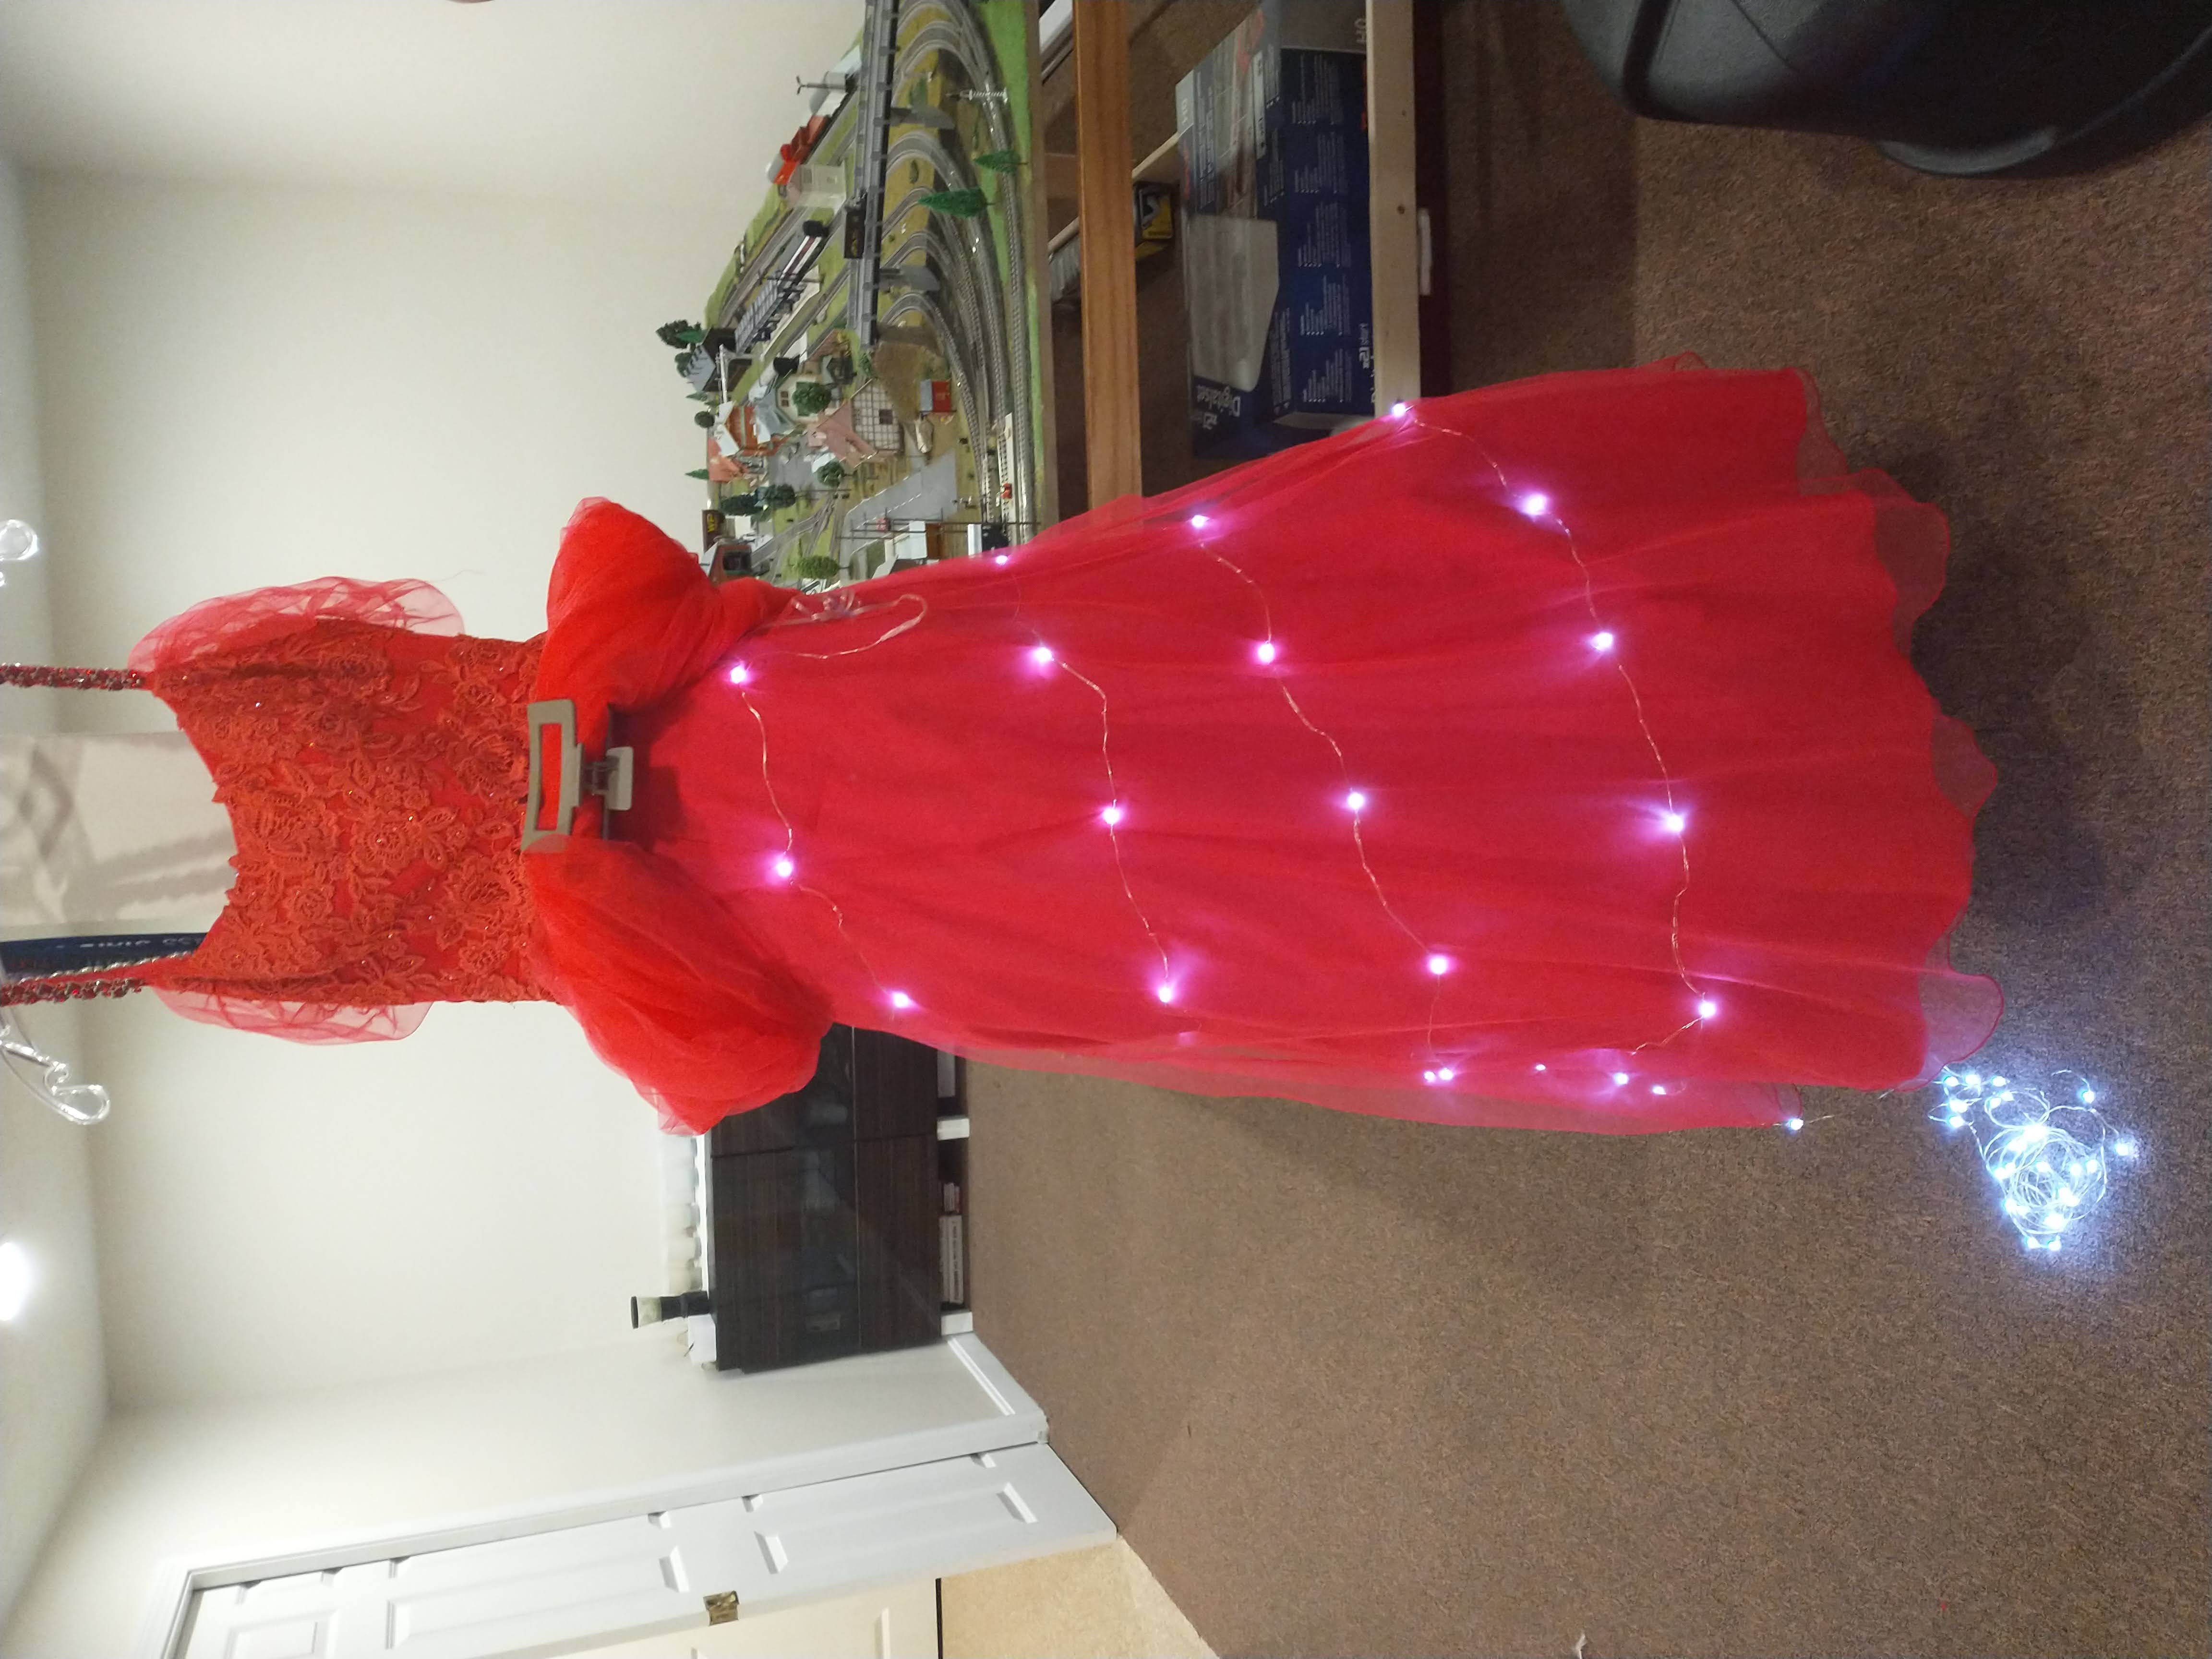
1. Prep your work station
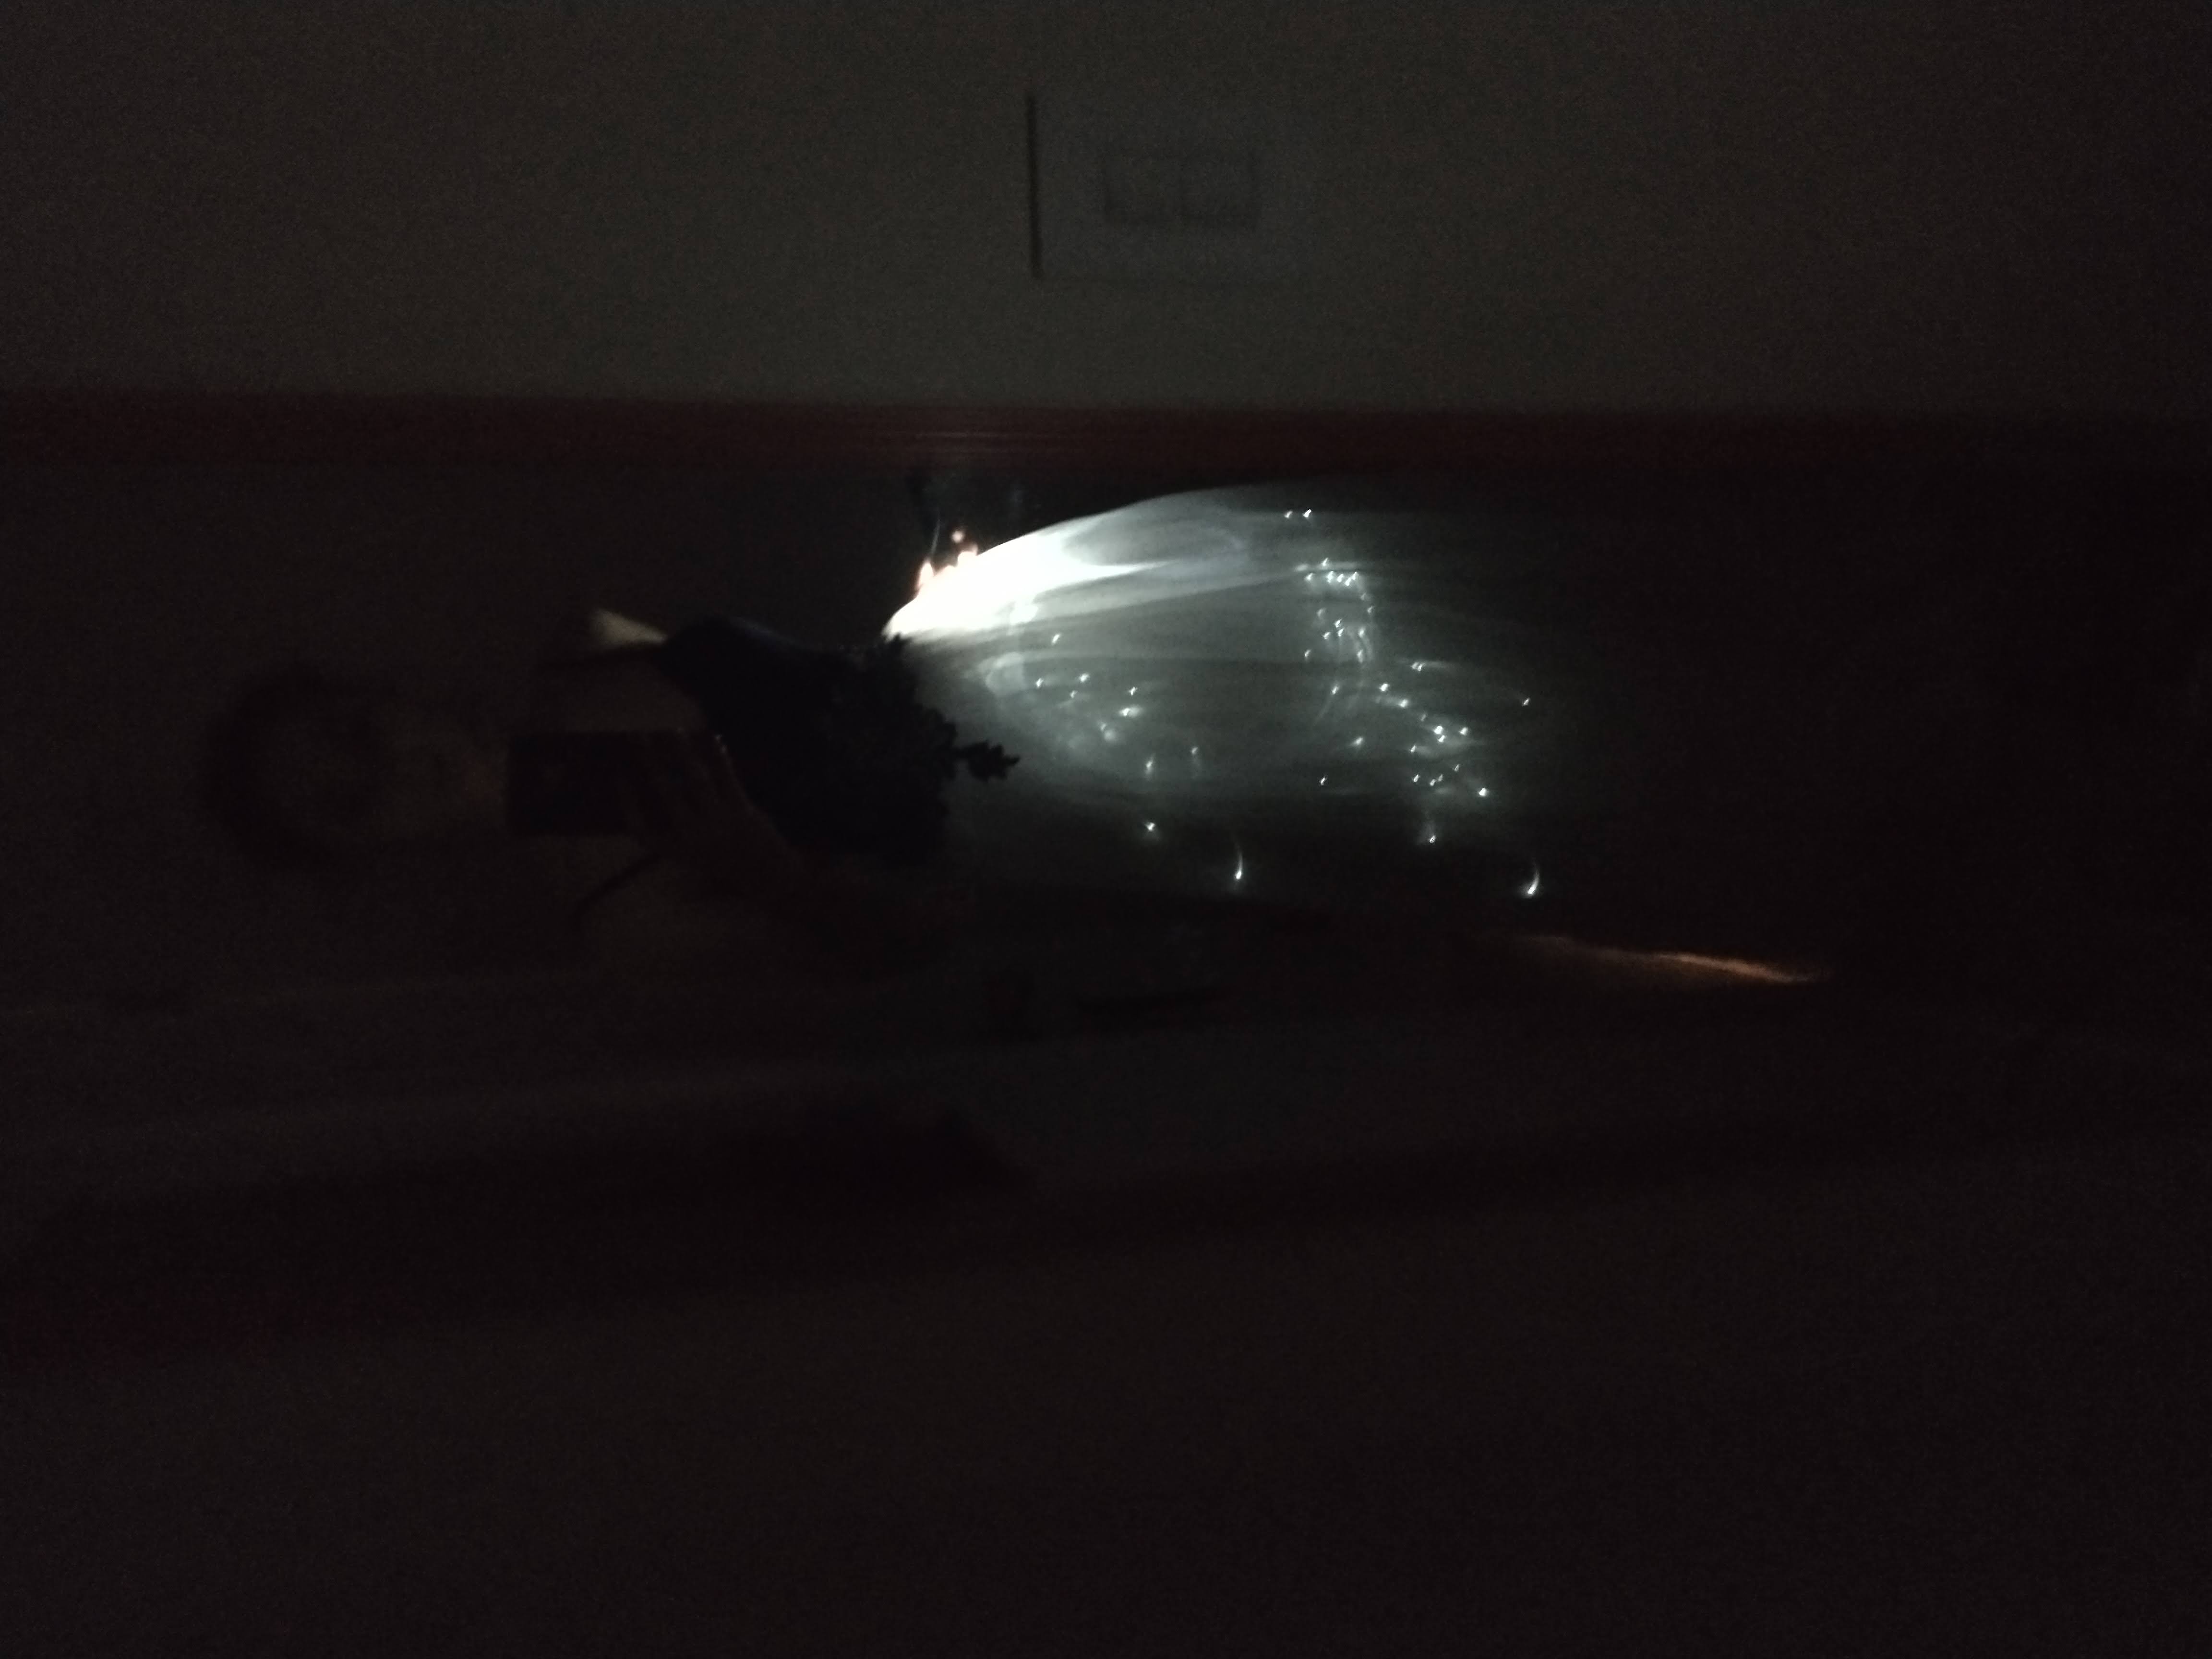
Holding up so many layers of fabric can be tricky, especially if you dont have any professional tailoring equipment. I held up the dress on a coat hanger, in place of a mannequin. To get all the fabric out of the way, I tied it up in the back with a shoe lace, and stuffed it down the inside of the dress. The layers of the fabric at the front were rolled up and clamped with a hair pin
 (This Image was taken after lights were added)
2. Make two holes through your dress
This was the hardest part for me in the process. Cutting wholes in an expensive dress can be nerve racking. If you plan on selling your dress, you might want to think twice about this project. Otherwise, the wholes arent visible if you cut them in the right spots.
Make a hole in the pocket of the dress, and in the bottom most layer of the skirt. This will allow the leds to be wired to the battery pack in your pocket. Make sure the hole is big enough to fit the fairy lights through, but not too big, so that your battery pack doesn't fall through.
3. Thread fairy lights through the whole
Unravel the fairy lights and thread them through the two holes you made in the dress. Make sure that the connection to the power source remains in the pocket.
4. Begin planning
Start wrapping your dress like a chrismas tree. Use a pin every other fairy light to fasten it in place. This will make it easier to plan and change things around before sewing. Since my dress is against a wall, I flip the dress around ad I get to the back of it.
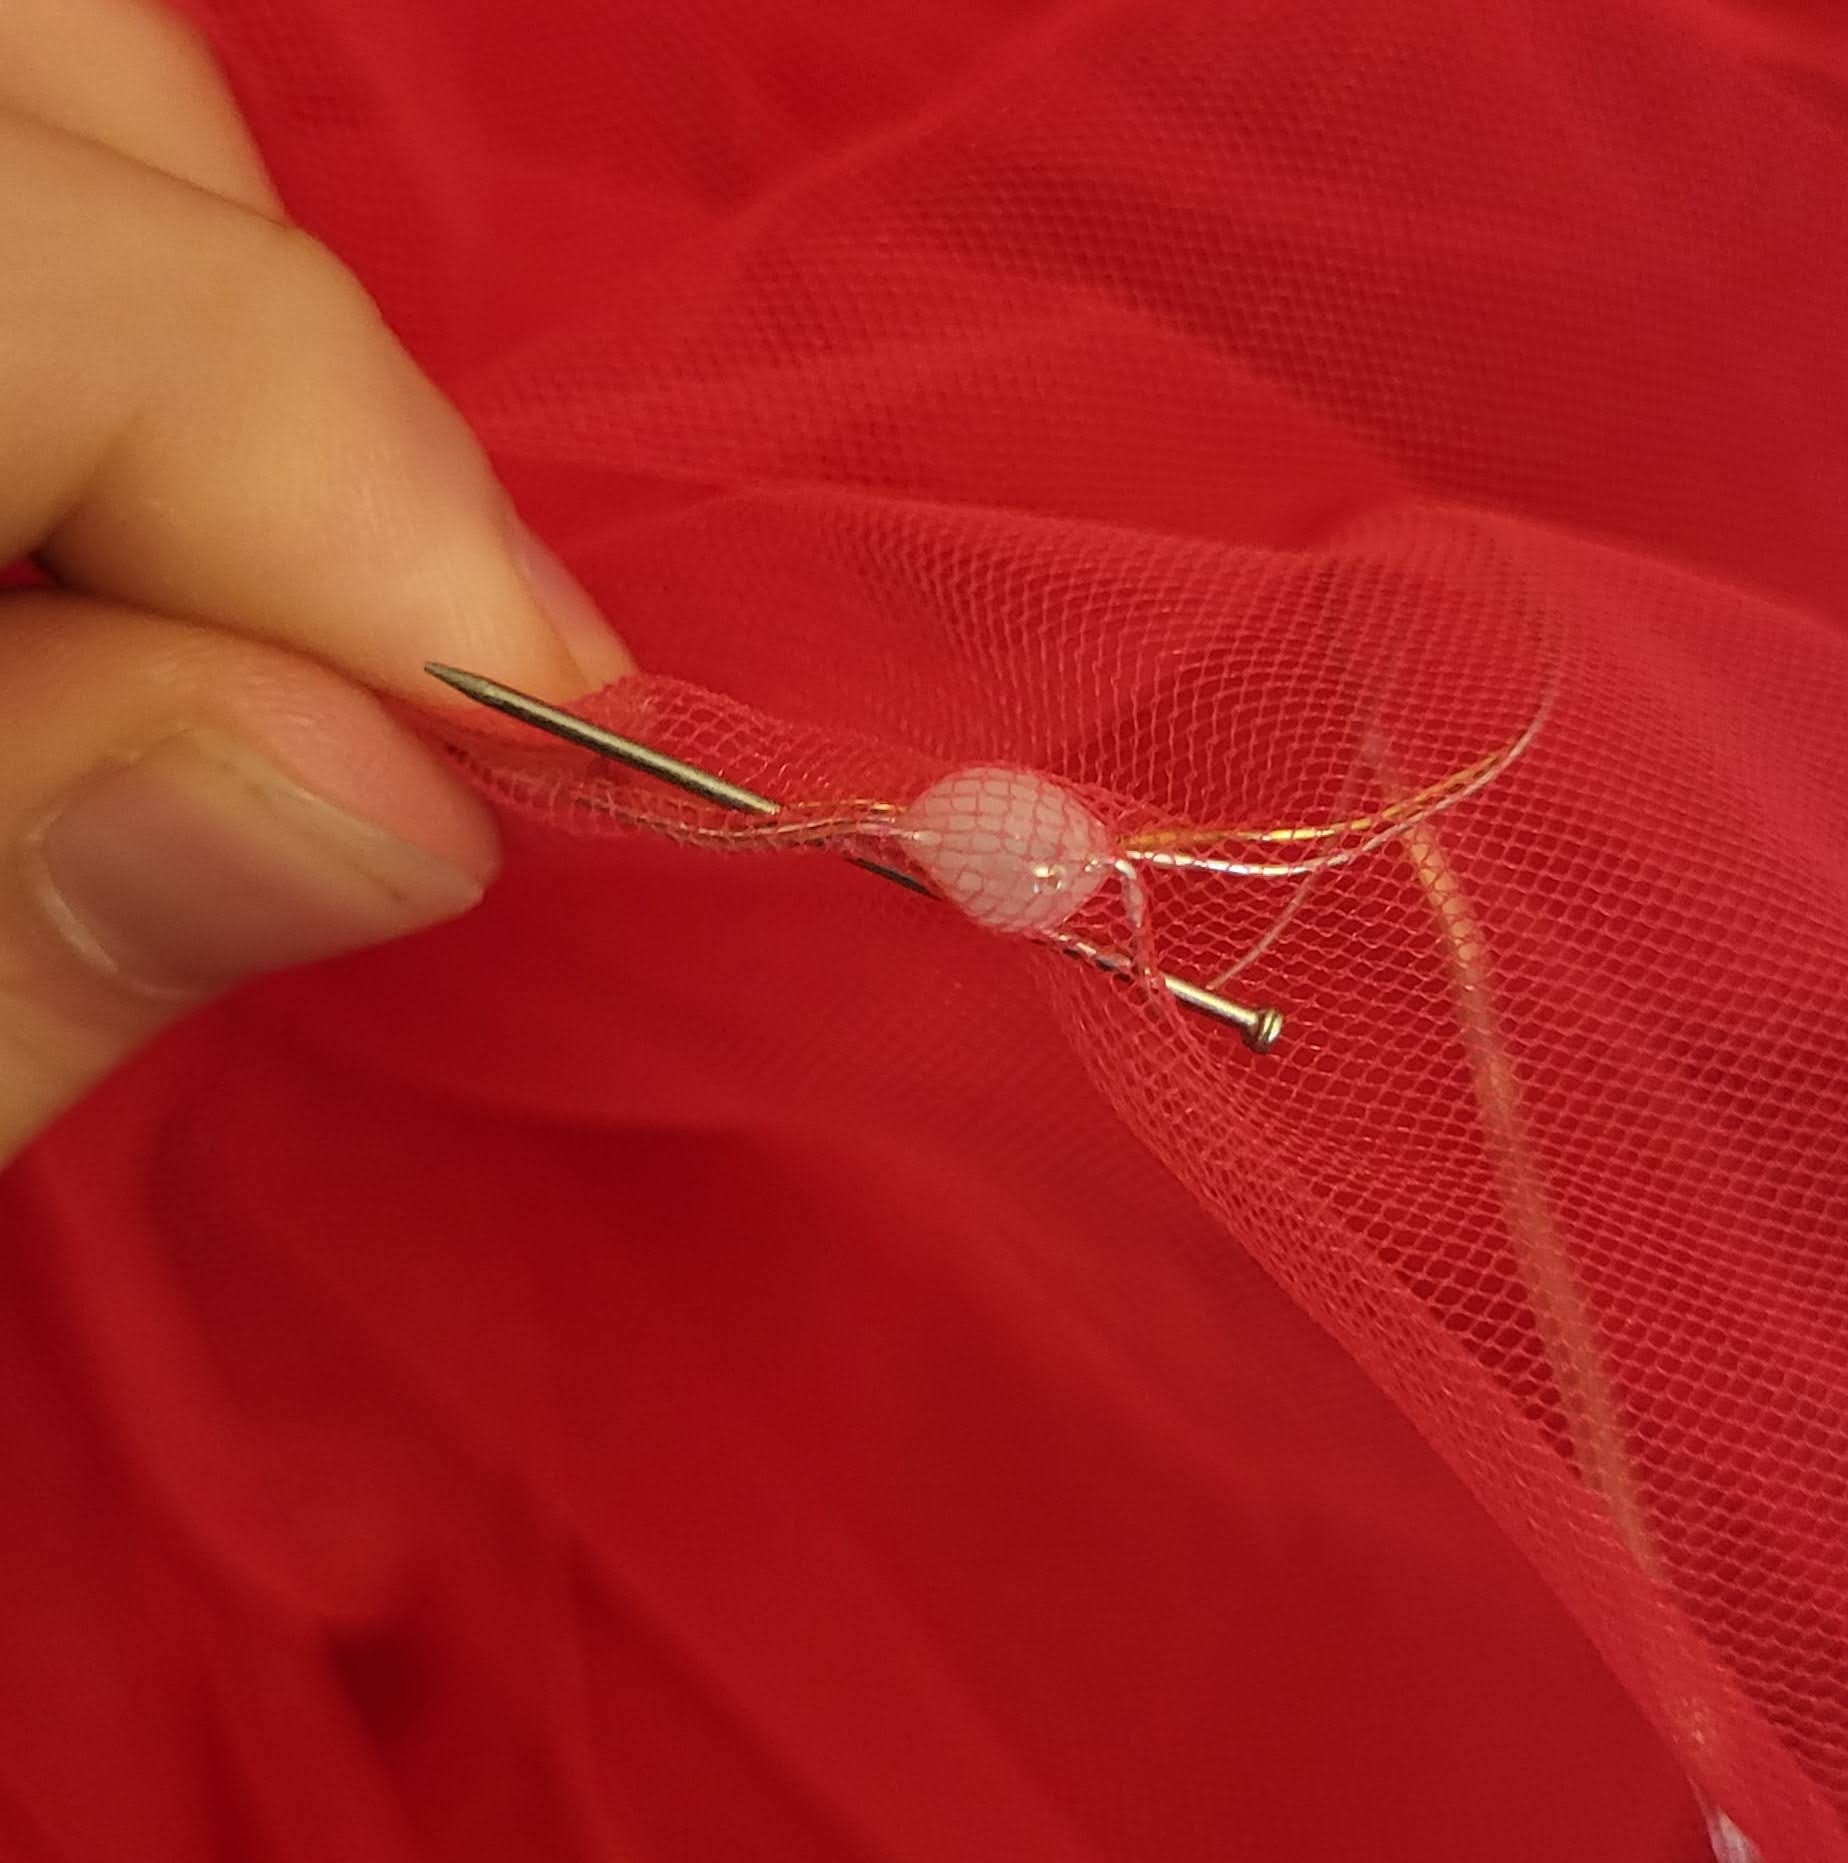
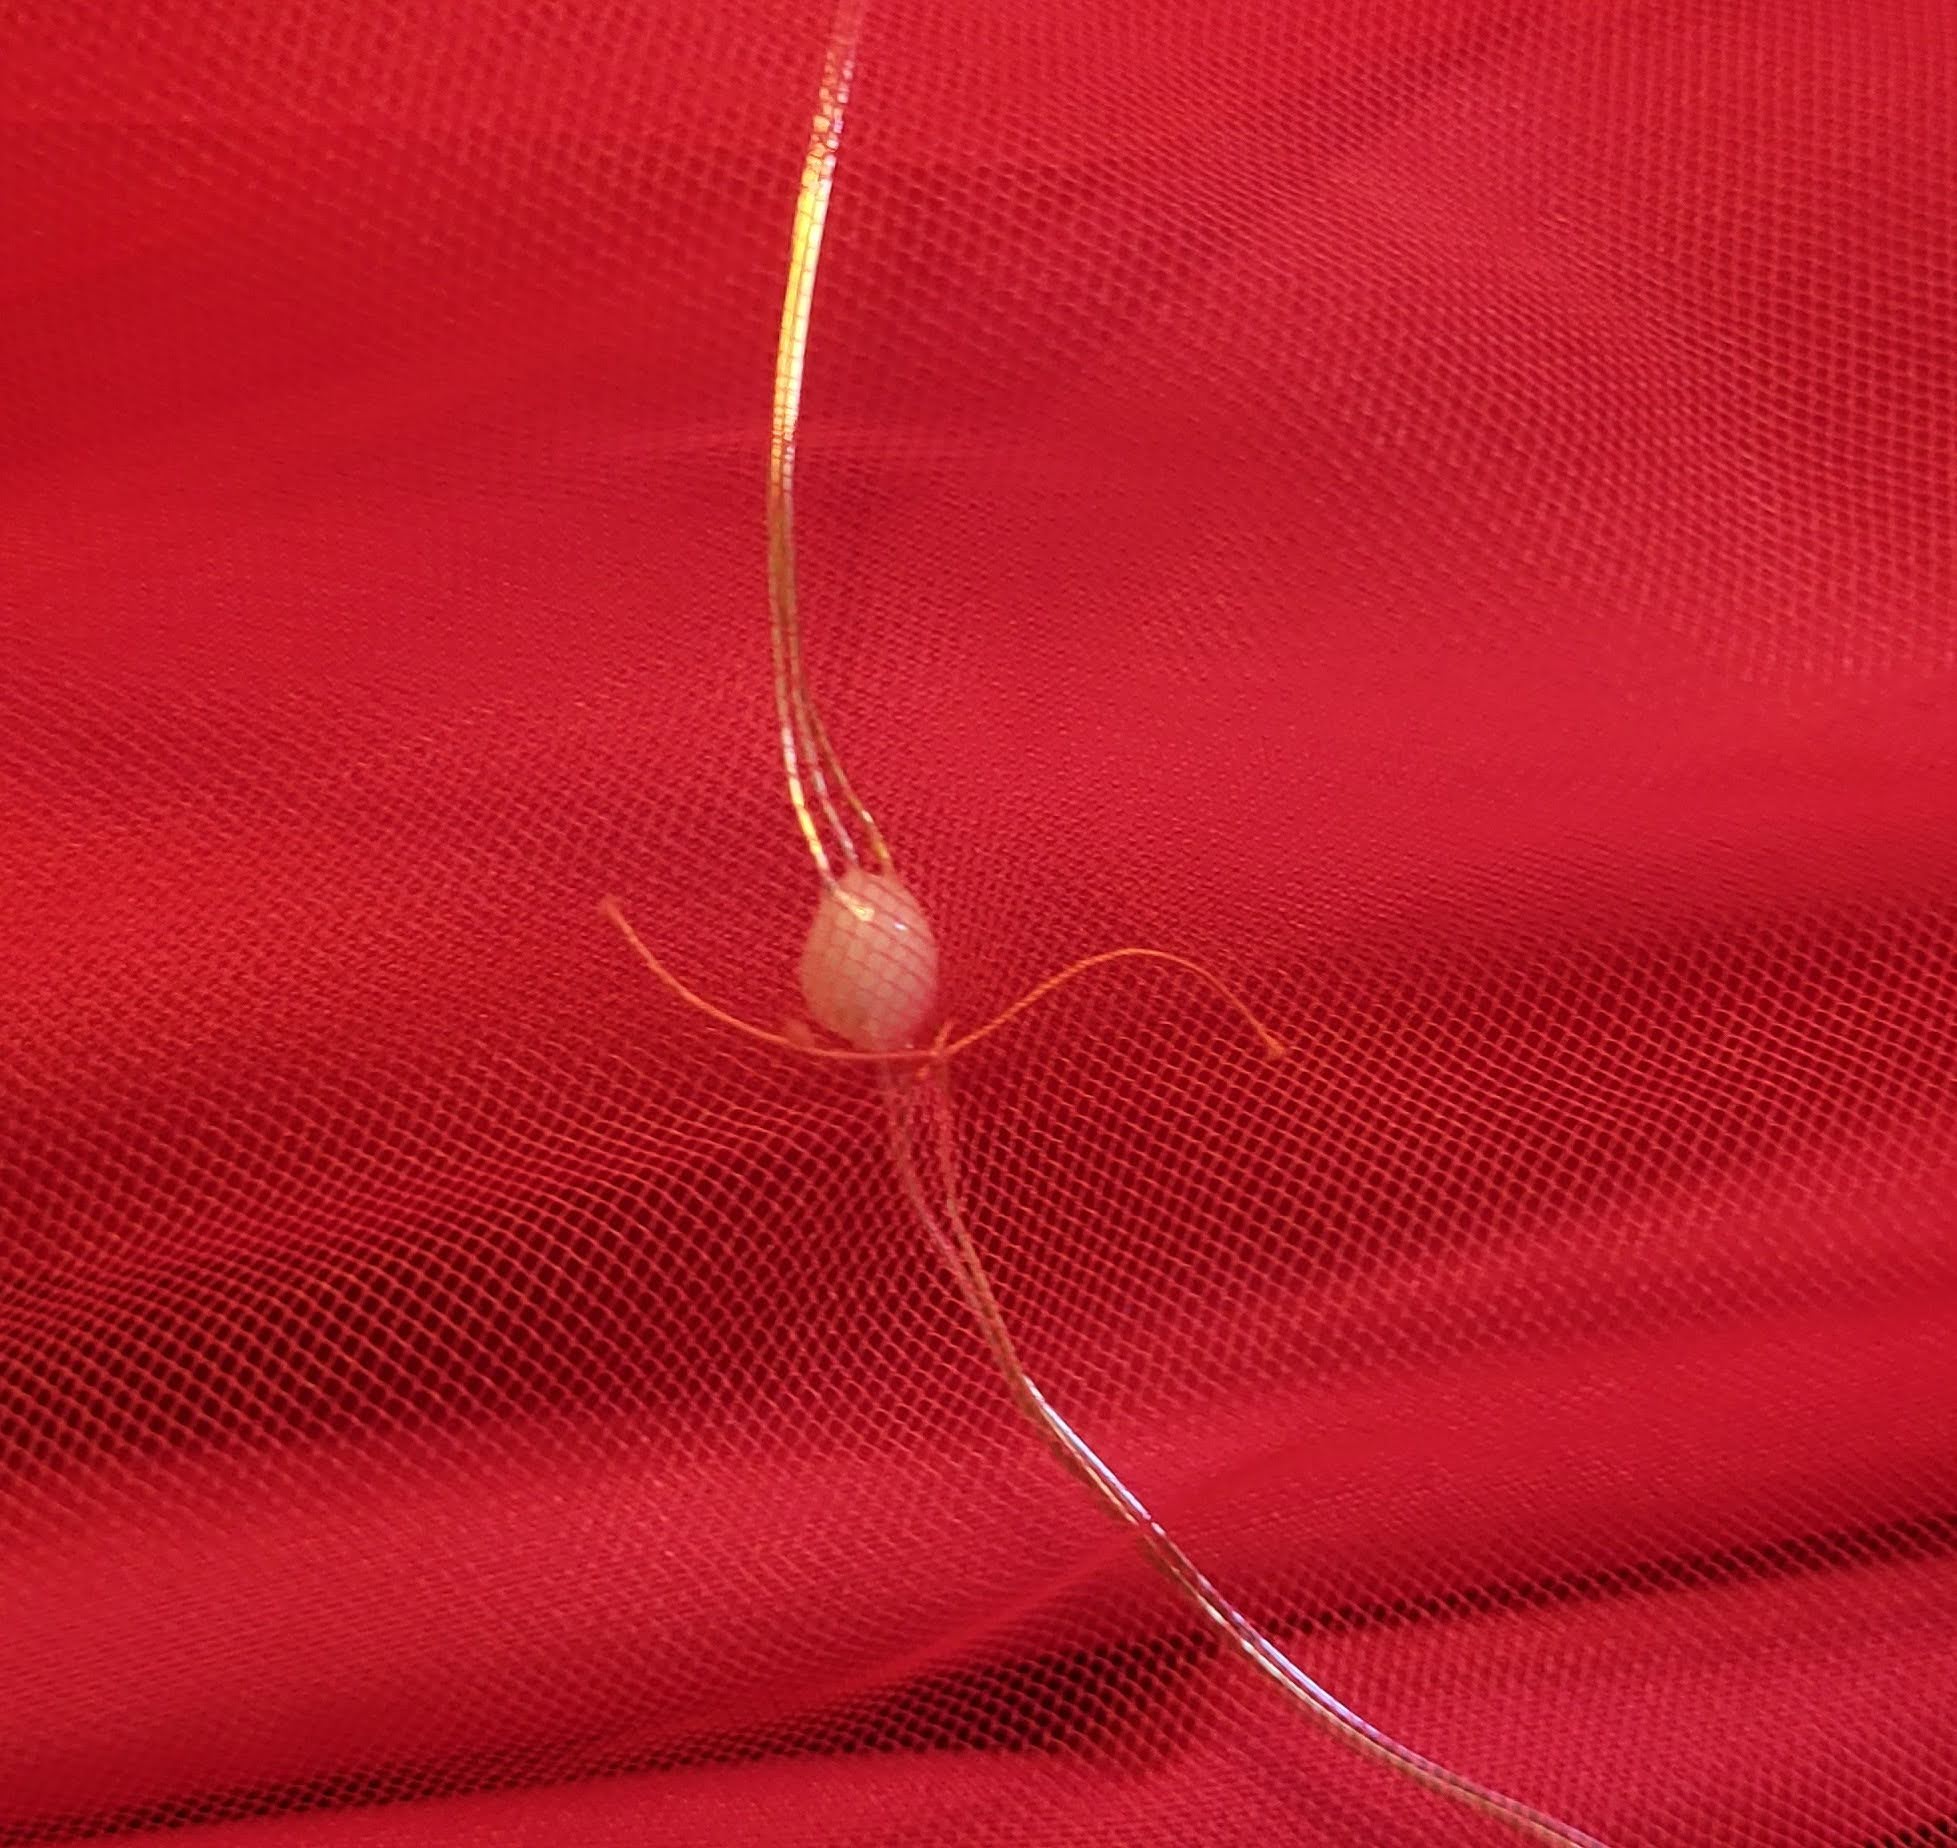
5. Sewing
Now you will start fastening the lights to the dress. Go to your first pin and take it out. Then, using a sewing needle, go through the middle wire and tie a knot through the wire and the fabric. Try making the loop as small as possible so you don't scrunch up the fabric as much. Each led uses a little bit of string. Repeat this process for each light. Only take out one pin at a time so your planned out design dosent move.
6. Finishing it off
At the very end, cut off any leds you didn't need. I had quite a bit of excess. Use tape to fasten the end to the dress.
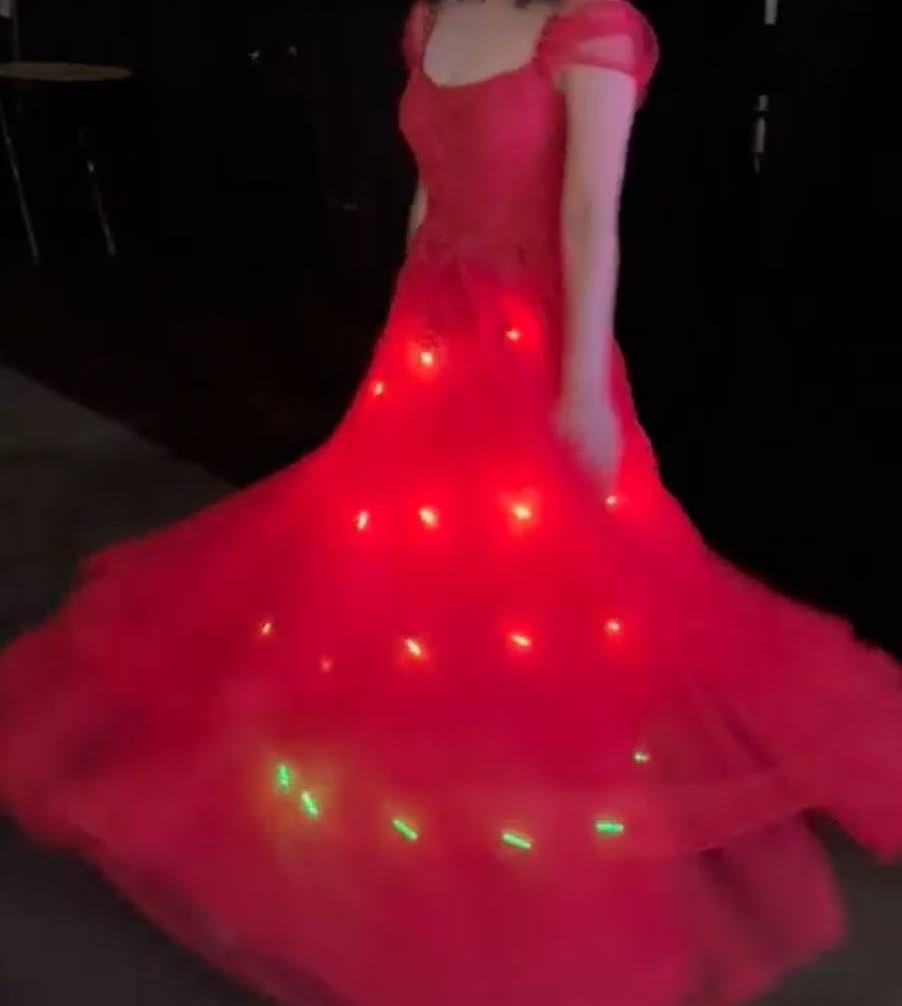
7.Connect the power source
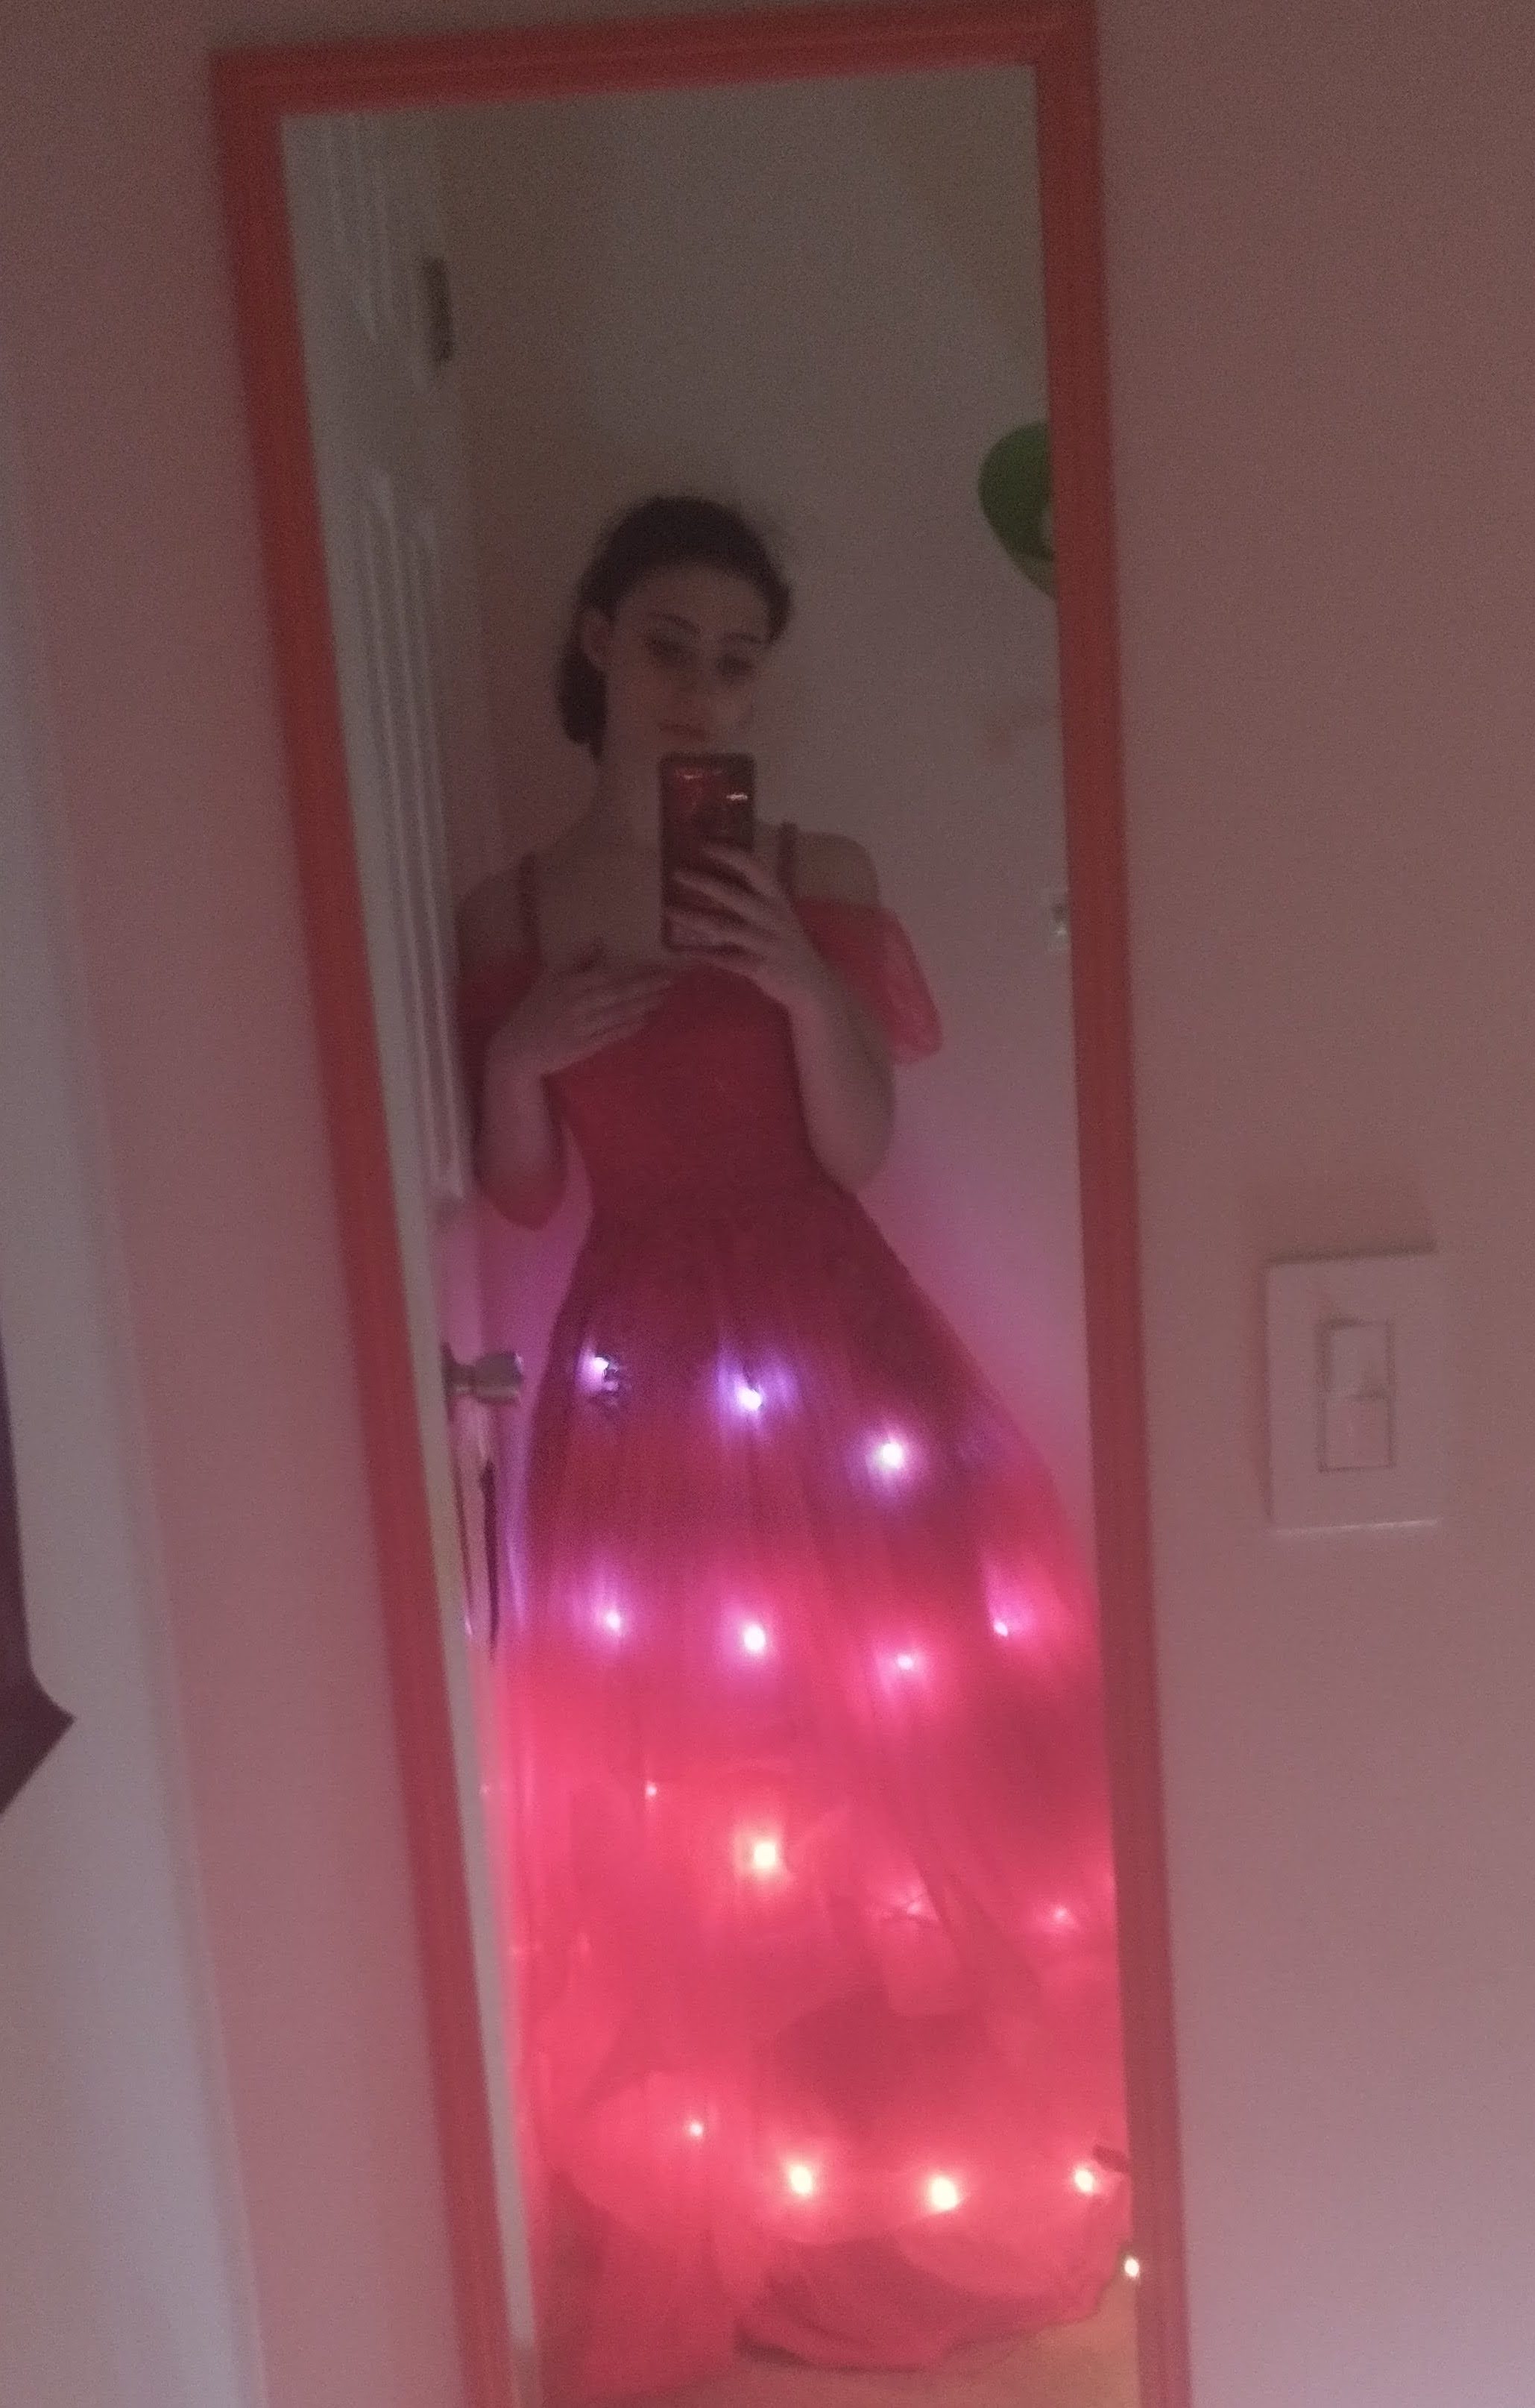
For a power source, i'm using a simple portable charger, that connects with usb. I got this charger for cheap at a random gas station, and it ended up lasting the whole night. Plug your lights into the battery, and Voila! Your lights should immediately light up. If they don't, you might need to turn them on with the provided remote.
When I began thinking about this project, I had 2 ideas:
- Use Fiber Optic lights
- Use fairy lights
Fiber optic lights are clear tubes with a light source on one end. What is unique about them, is that they carry light to the ends, and where the light is visible. The light is not visible on the sides of the tubes, even though they are seemingly clear. This makes for a beautiful stary effect. However, fiber optics can be very difficult to work with. They require a very specific vision and mind, and lots of precision to look right, since they are so thin.
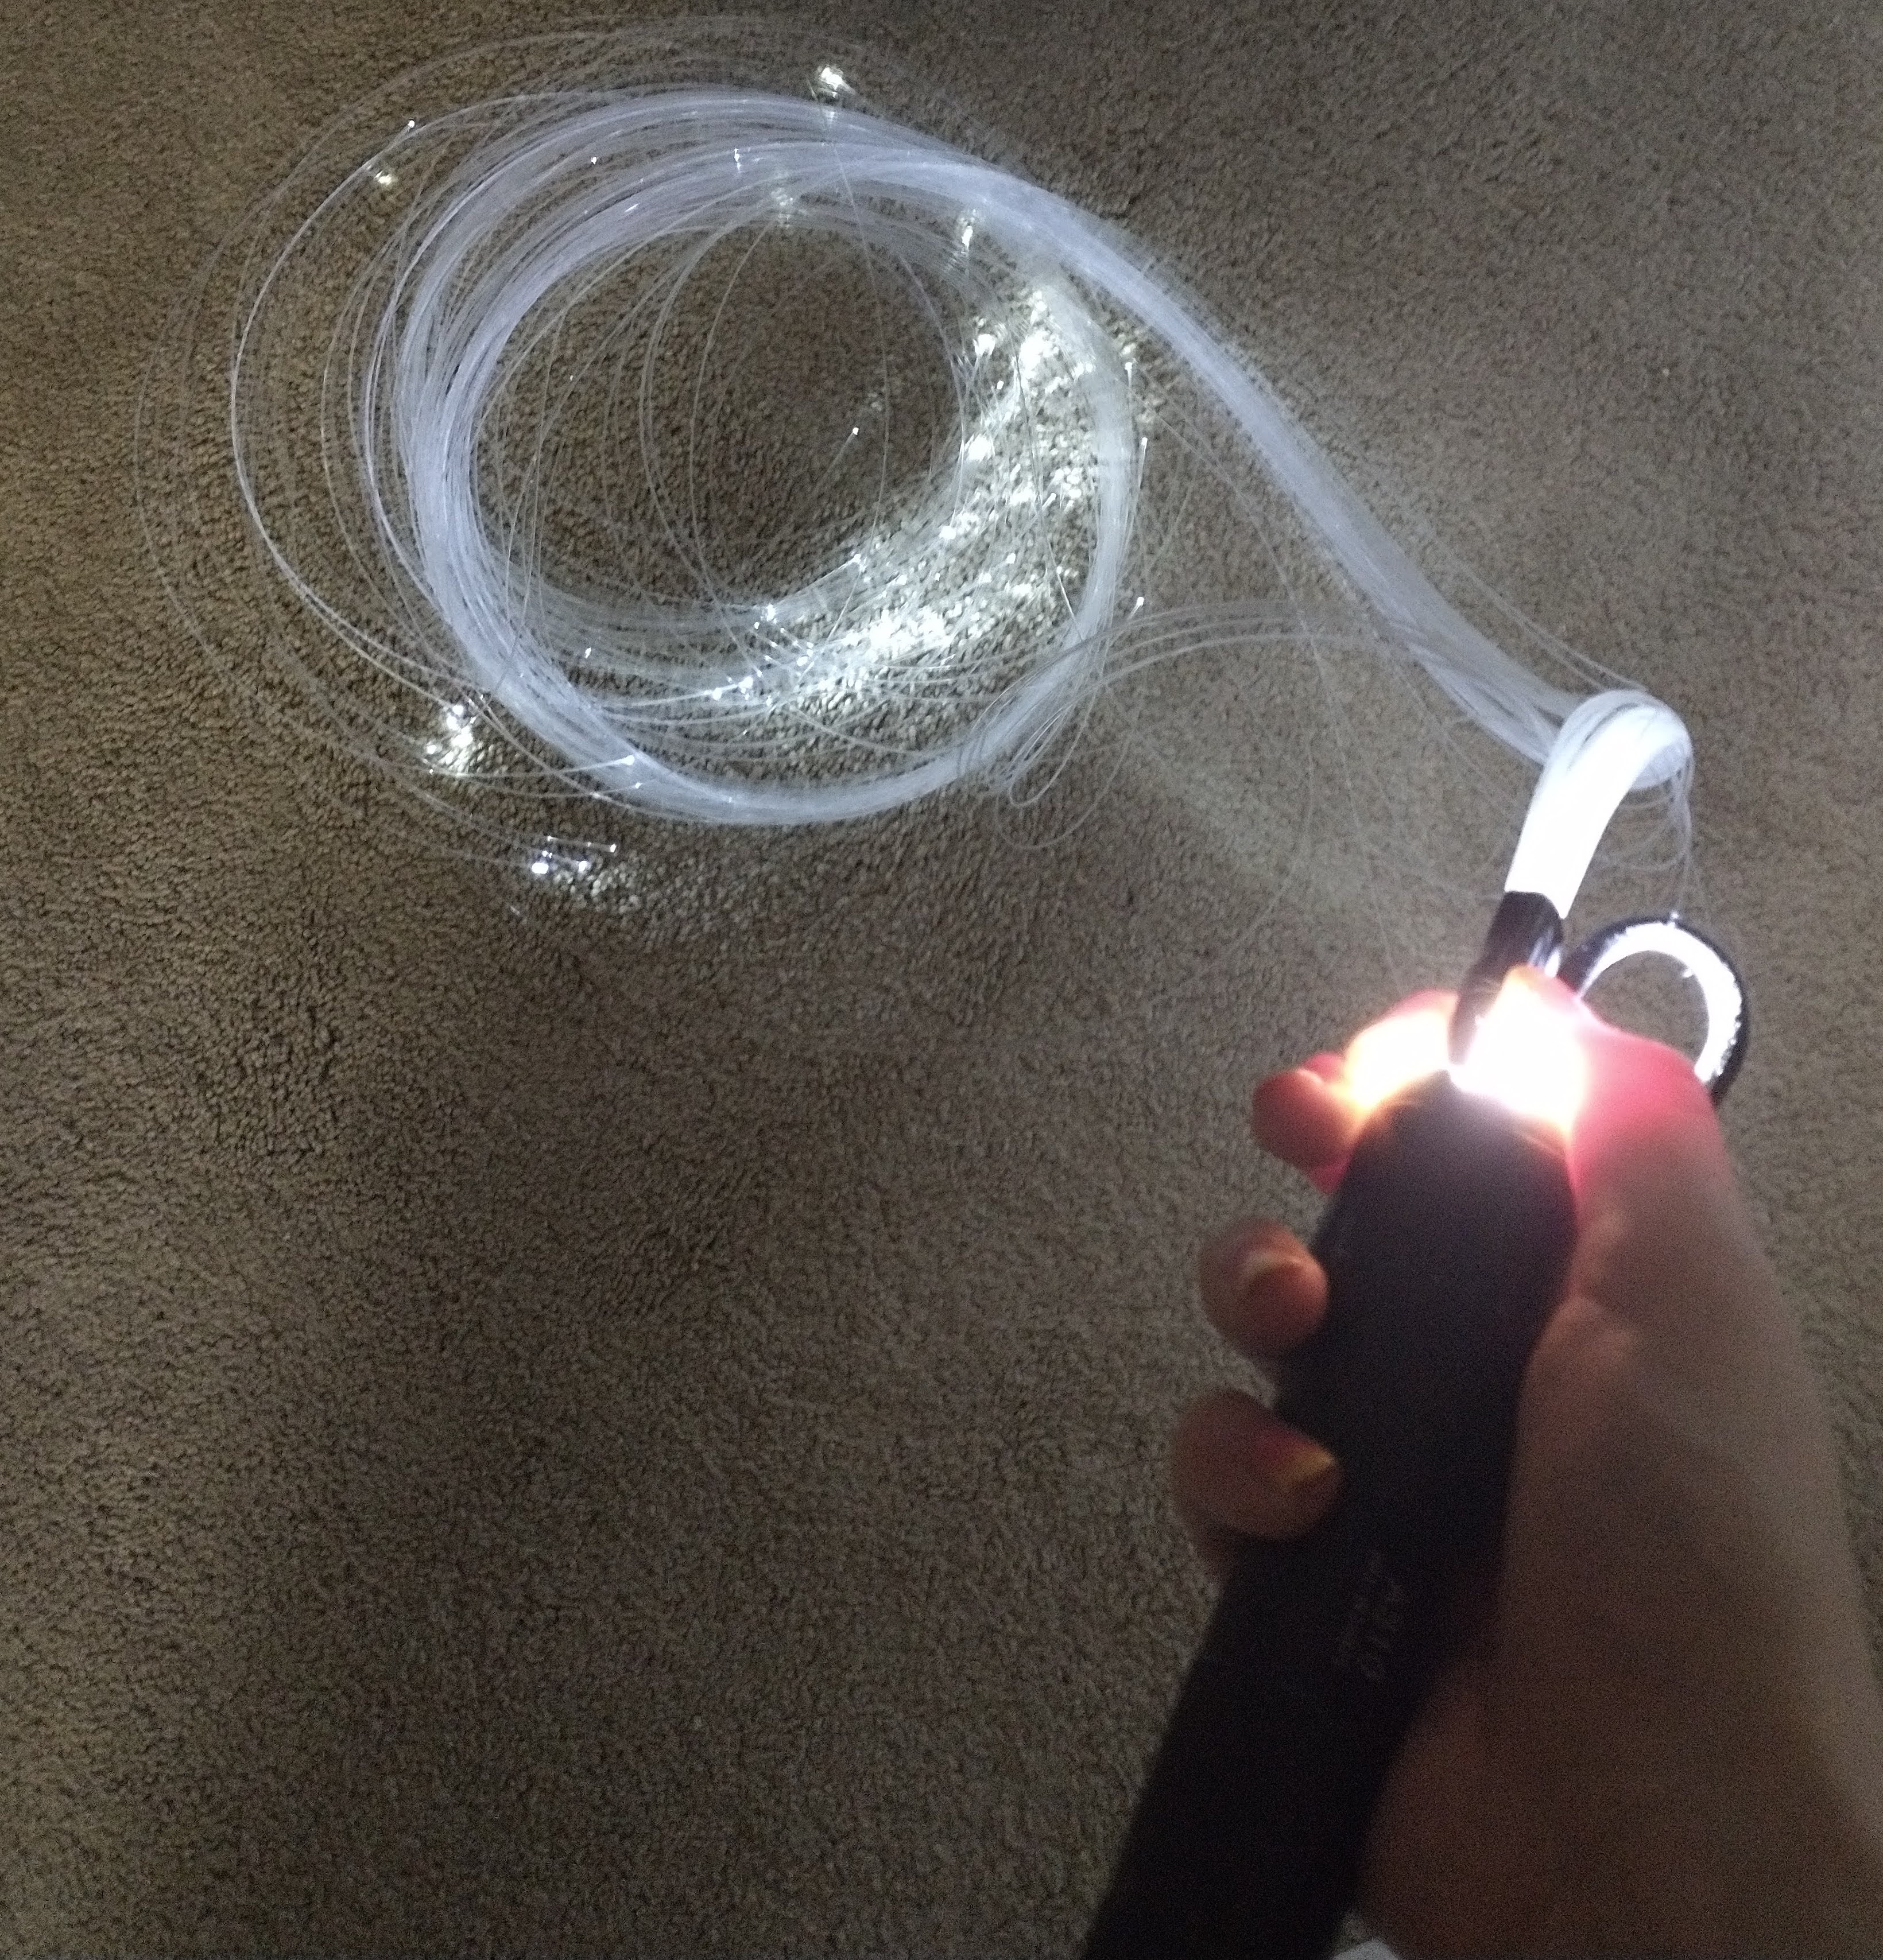
Here is an innitial proof of concept I did with fiber optics. For lighting, I just held a flash light up to the fibers.
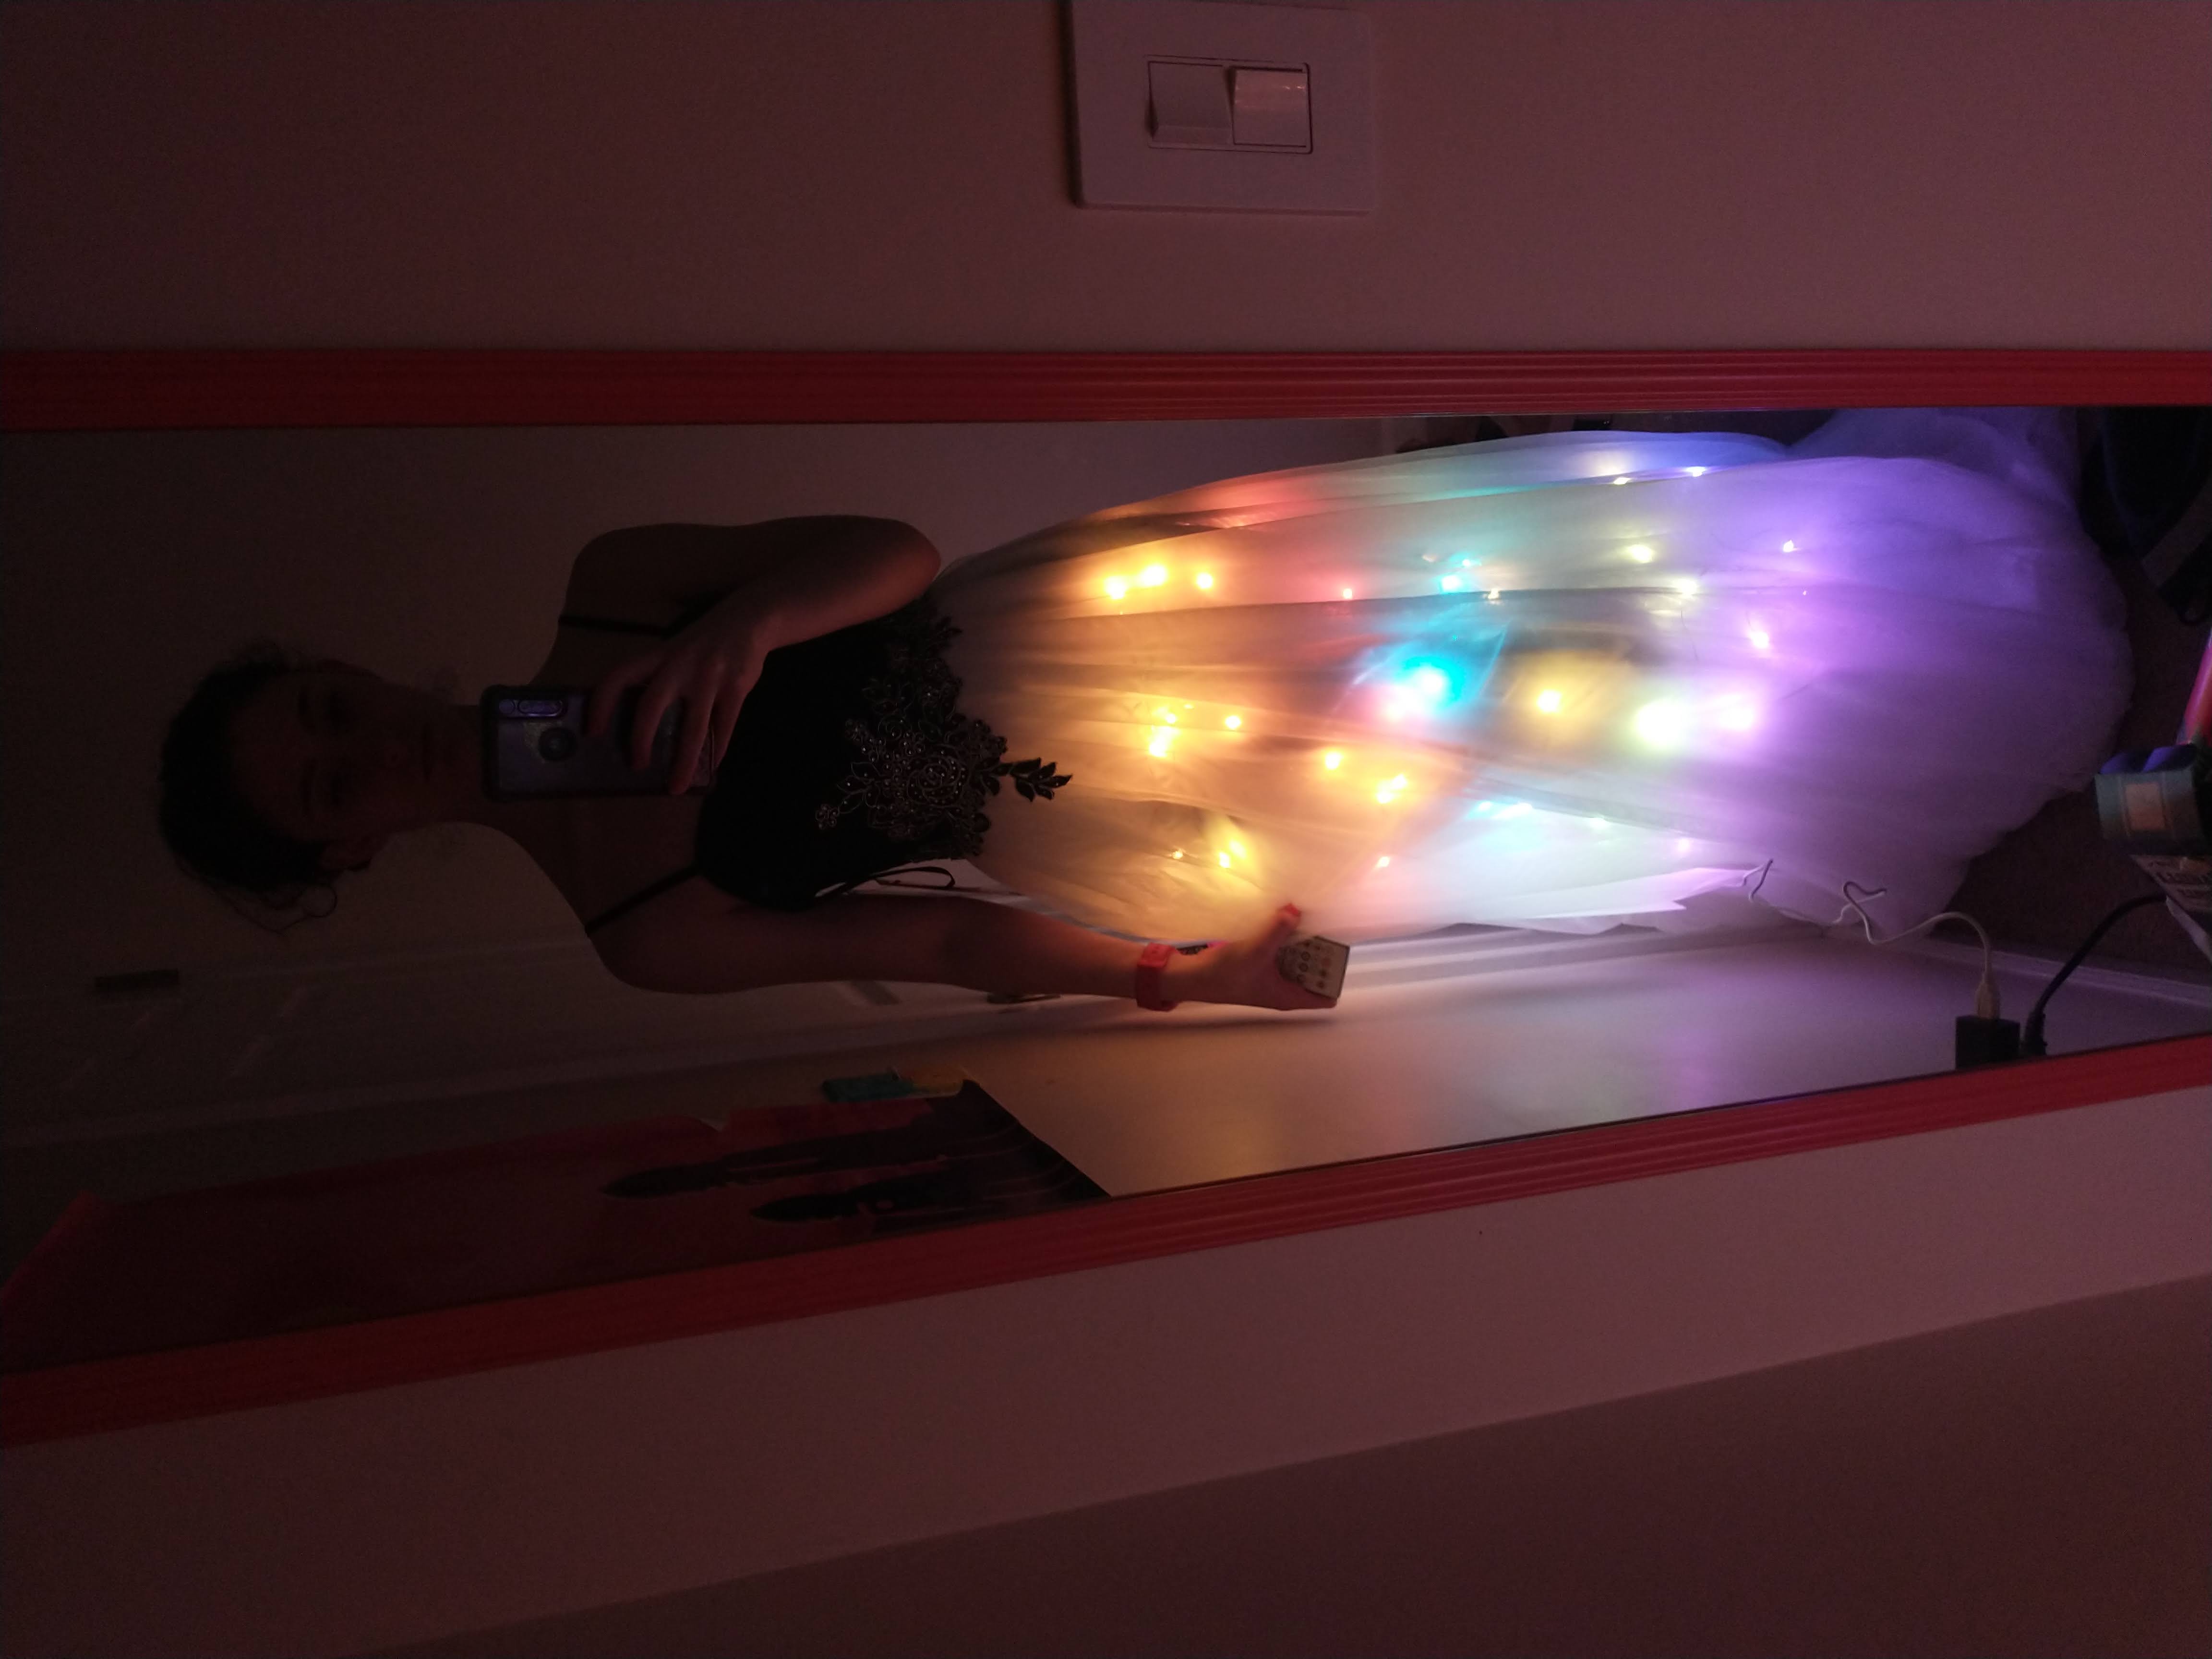
I also tried using fairy lights. I found that just holding it up, I had a better result with the fairy lights that the fiber optics, so I decided to go with those.